The best photo spots in Banff (+ how to get there in 2026)

Famous for its turquoise lakes and majestic mountains peaks, Banff National Park is a photographer’s paradise. Whether you’re shooting with a DSLR or a camera phone, there are so many incredible photo spots in Banff where you can capture the park’s rugged beauty. I’ve been to the park six times in the past five years and have explored a lot of Banff’s most photogenic spots.
In this post, I’m sharing my favourite photo spots in Banff National Park, including some suggestions on the best time to go and how to get there. I’ll also share some useful photography tips that I’ve picked up over the years, including lighting considerations, camera settings, and gear recommendations. Let’s dive in!
Disclaimer: This blog post features some affiliate links, which means I get a small commission if you make a purchase. There’s no extra cost to you but it just helps me to keep writing these free guides and itineraries. Thank you for your support!
Best photo spots in Banff
- Banff Avenue
- Lake Louise
- Peyto Lake
- Two Jack Lake
- Moraine Lake
- Larch Valley
- Bow Falls
- Surprise Corner
- Little Beehive
- Lake Agnes
- Hoodoos
- Lake Minnewanka
- Sulphur Mountain
- Castle Mountain
- Vermillion Lakes
- Johnston Canyon
- Bow Lake
- Waterfowl Lakes

The best photo spots in Banff National Park
There are so many beautiful and iconic sights to photograph so I’ve compiled a list of the best photo spots in Banff to help you plan your own trip. These spots are accessible all year round, except for Moraine Lake and Larch Valley as the road to get to them closes in November and opens again in June. To help you plan your trip, I’ve included the best time to photograph each location and how to get there (updated for 2026).
At the end of the guide you’ll find a map with all of the places listed here. To save the map, click on the star on the right hand side of the title. This will save the map to “Your Places” in Google Maps.
1. Banff Avenue

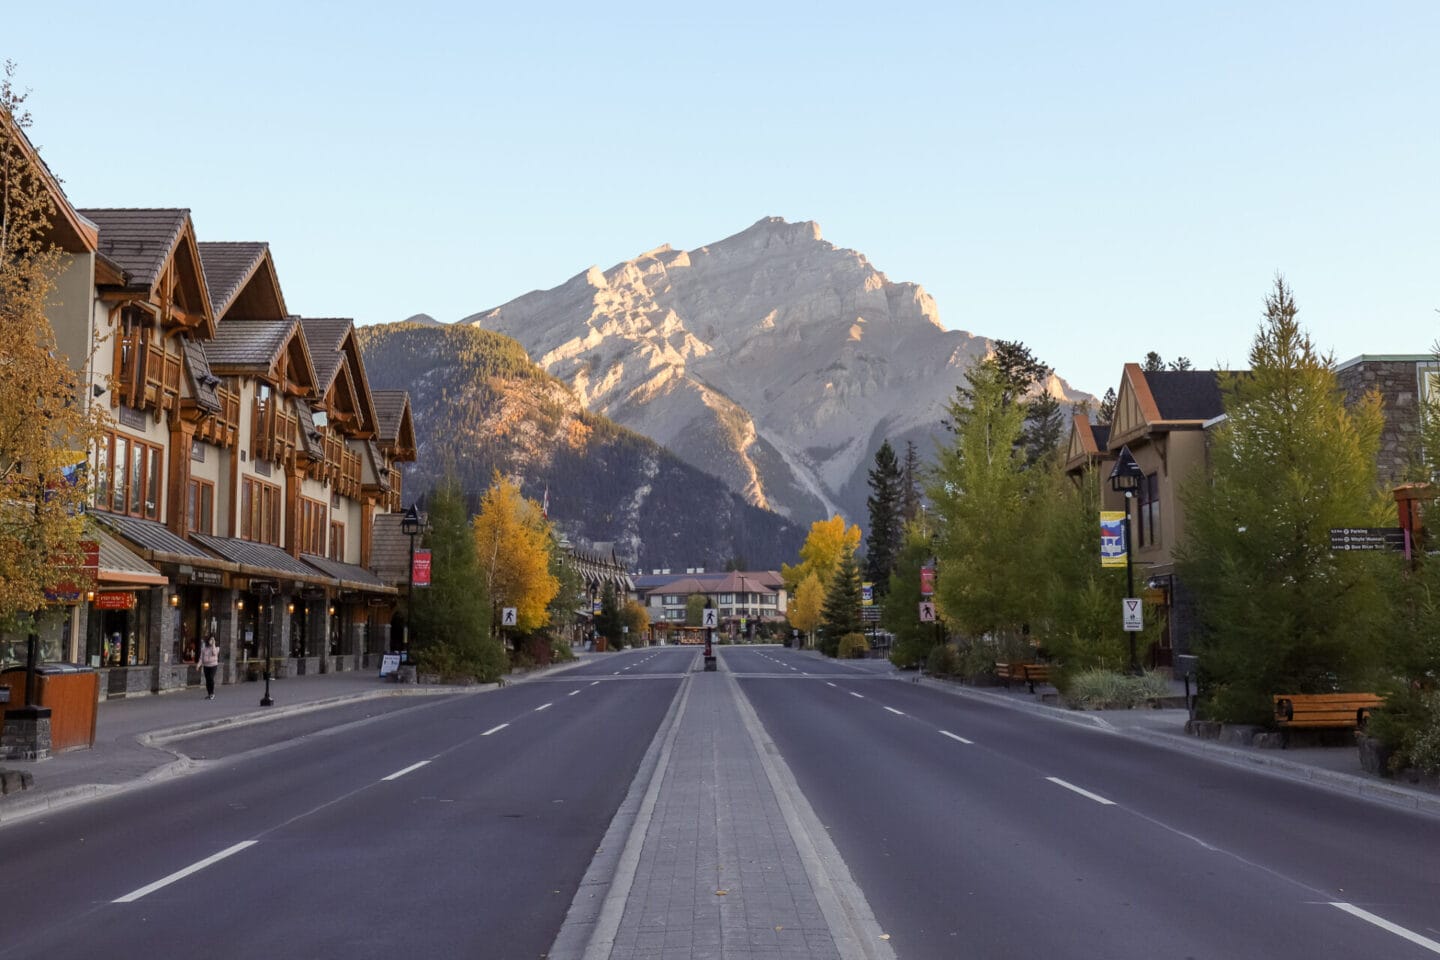
If you’ve seen photos of Banff, it’s likely that you’ve seen the iconic shot of Banff Avenue with the imposing Cascade Mountain towering at the end of the street. It’s one of my favourite photo spots in Banff, especially in winter when the mountain is dusted in snow.
After years of photographing this spot, my top tip is to shoot from as far back as you can with a telephoto lens. My favourite place to stand is Buffalo Street just before the bridge on the south end of the road. If you’re using a telephoto lens, this will allow you to play around with compression and make Cascade Mountain look even larger.
Best time for photography:
The best time to go is first thing in the morning before the shops open, when the light is soft and there aren’t many cars or crowds of people. It’s also a great place for night photography as you can capture some stunning light trails from the cars passing on both sides of the avenue.
How to get there:
Banff Avenue runs through the heart of the town so if you’re staying close by you can easily walk to this photography spot.
2. Lake Louise

The Canadian Rockies are home to some of the world’s most beautiful lakes, none more famous than Lake Louise. With its shimmering turquoise water and soaring mountain backdrop, Lake Louise is a photographer’s paradise all year round. In winter, the lake freezes over and turns into a winter wonderland. People go skating and there are often huge ice castles and sculptures on the lake shore. In summer, the rock flour from the melting glaciers gives the lake its famous colour.
One of the most magical things about Lake Louise is that the colour of the water changes depending on the weather and time of day. Sometimes it’s a pretty milky green, whilst other times it’s a brilliant shade of blue.
There are plenty of photo opportunities too. Stand at the dock and get some shots of Victoria Glacier and the pretty boathouse with the iconic red canoes. Afterwards, walk around the shoreline to get a lovely view of the fairytale Fairmont Chateau Lake Louise. If you have time, rent a canoe and paddle out on the lake for a different perspective.
Best time for photography:
My favourite time to photograph Lake Louise is at sunrise as you often get the beautiful alpen glow on the mountains behind the lake. Early morning is also a lovely time as you can capture the beautiful blue water before the sun gets too high.
How to get there:
As one of the most popular photography spots in Banff, Lake Louise gets very busy, especially in the summer months. You can drive to Lake Louise but parking tends to fill up quickly and it’s very expensive. As of 2026, it now costs $42 per vehicle to park at Lake Louise for the day.
If you’re visiting in the peak of summer or during larch season, I wouldn’t even attempt to park at Lake Louise Lakeshore anymore! Instead, reserve a spot on the Parks Canada shuttle bus and park at Lake Louise Park & Ride, located at the Lake Louise Ski Resort. The shuttles run every 30 minutes from 6:30am to 7:30pm from mid-May to mid-October. Tickets cost $11.50 per adult if you book online and include your return trip to your vehicle. Alternatively, take Roam Transit Route 8X from Banff directly to Lake Louise Lakeshore.
Travel tip | Shuttle bus reservations will open on April 15, 2026, at 8am MDT. Save the date as they will get booked quickly! If you miss out, don’t panic, additional seats will be available to reserve at 8am MDT two days prior to departure.
3. Peyto Lake
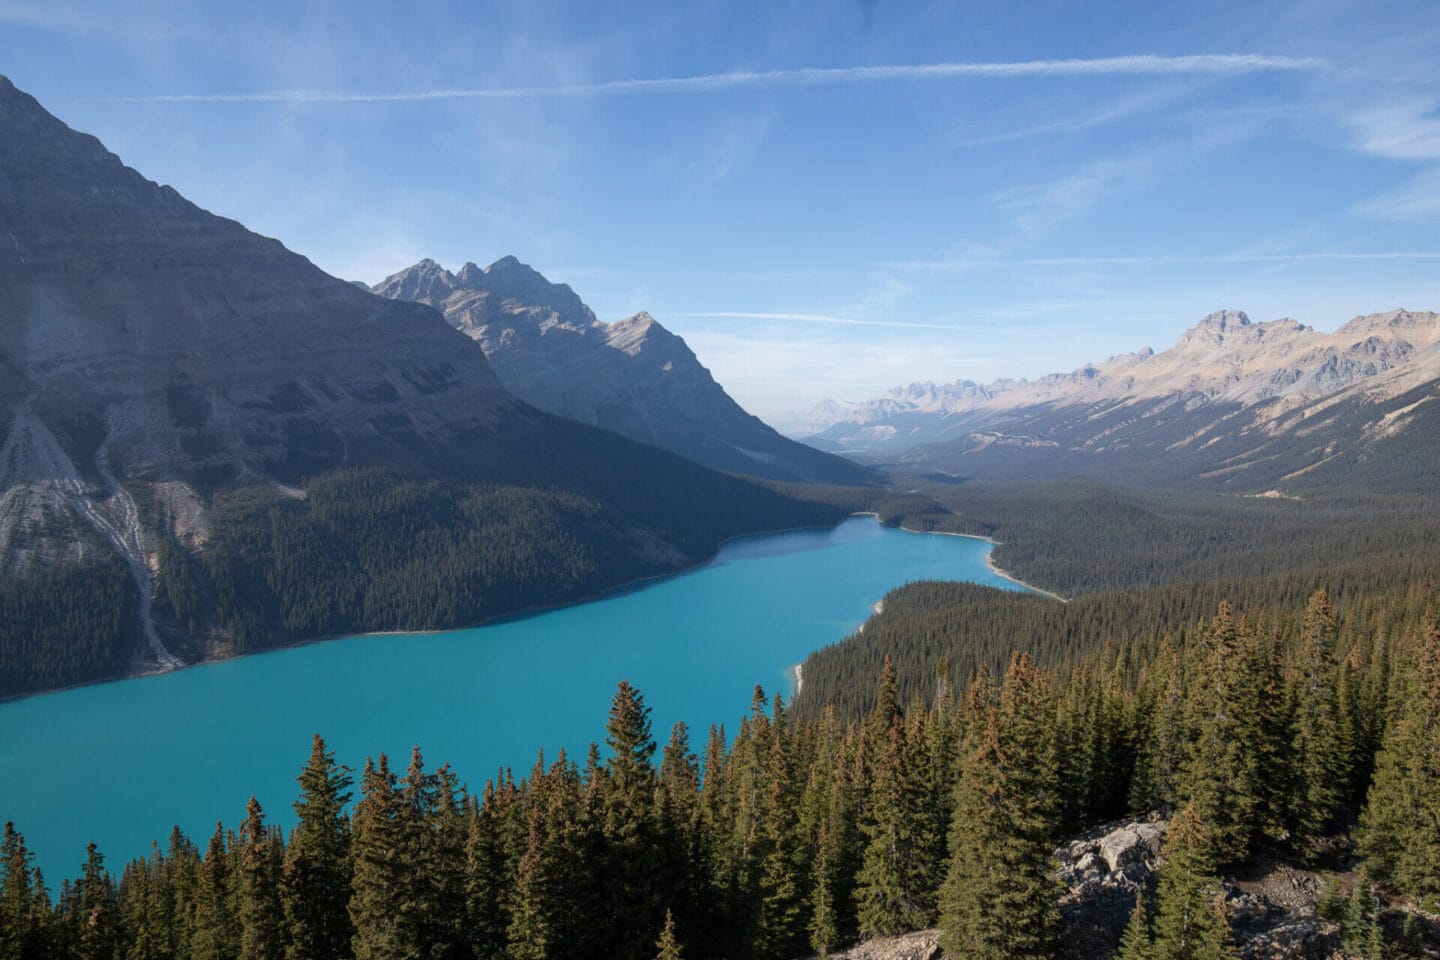
Peyto Lake is one of the most famous Icefields Parkway stops. The lake is renowned for its brilliant aqua colour created by the melt water from the Wapta Glacier. It’s a short walk uphill from the car park to the viewing platform where you can get some beautiful photos of the lake. It takes about 20 minutes to reach the viewing platform. If you’re travelling in winter, you may need snow shoes as the snow is very deep and your feet can easily fall through.
The viewing platform gets very busy and as a photographer, I don’t think you get the best views from this spot. If you’re able to, leave the viewing platform and continue along the path into the forest. The trail will split and if you take the right turn, you’ll eventually reach a rockpile where you’ll get amazing views looking over Peyto Lake. This spot has become busier in recent years, but it is still quieter than the main viewing platform. If you decide to walk here, please stay on the designated path and follow the leave no trace principles to protect the flora and fauna.
Best time for photography:
The best time to photograph Peyto Lake is first thing in the morning as the sun rises or just before the sun sets. We went late afternoon (around 4pm) and the light was nice and soft but we were too early for the golden glow. If you’re travelling to Banff in October, you may even be lucky enough to see Peyto after the first snowfall. It’s a beautiful sight as the surrounding trees are covered in snow, but the lake isn’t frozen yet so the blue pops against the white landscape.
How to get there:
Peyto Lake is located along the Icefields Parkway. If you’re driving from Banff/ Lake Louise, it will be on your left hand side. The turning comes up quite quickly after Bow Lake so keep your eyes peeled for signs to ‘Peyto Lake/ Bow Summit’.
Travel tip | If you are travelling without a car, there are a number of tours you can book which include a stop at Peyto Lake. I recommend the Lake Louise and Icefields Parkway tour. It’s a full-day sightseeing tour that will take you to Lake Louise, and then up the Icefields Parkway to Bow Lake and Peyto Lake, before dropping you back at your hotel. Unlike some tours, this one runs all year round so you can see some incredible spots on this Icefields Parkway itinerary regardless of when you visit.
4. Two Jack Lake
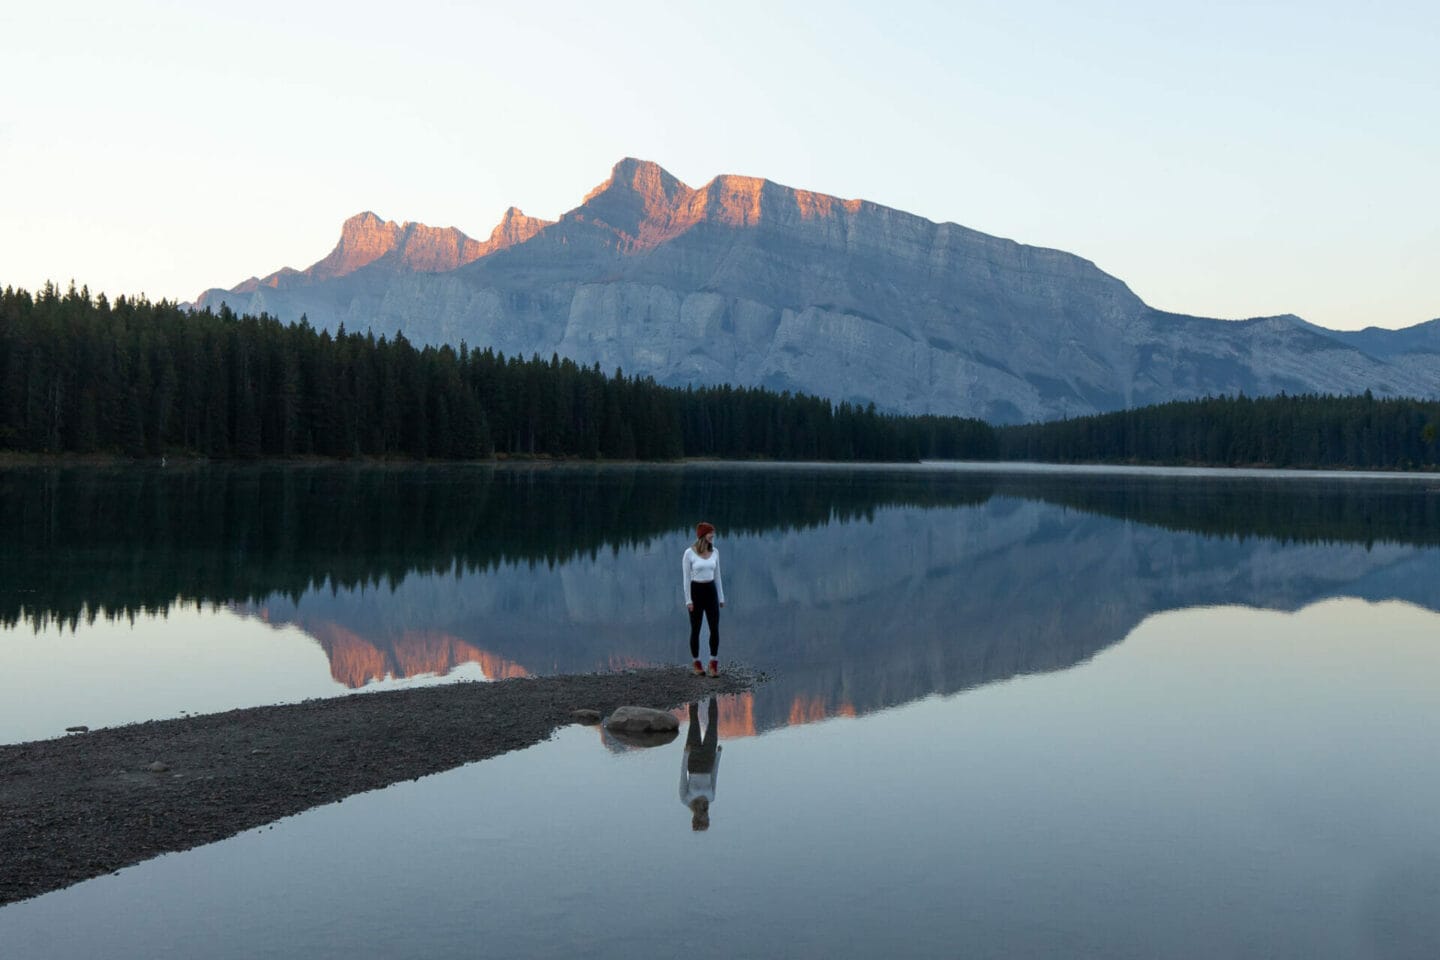
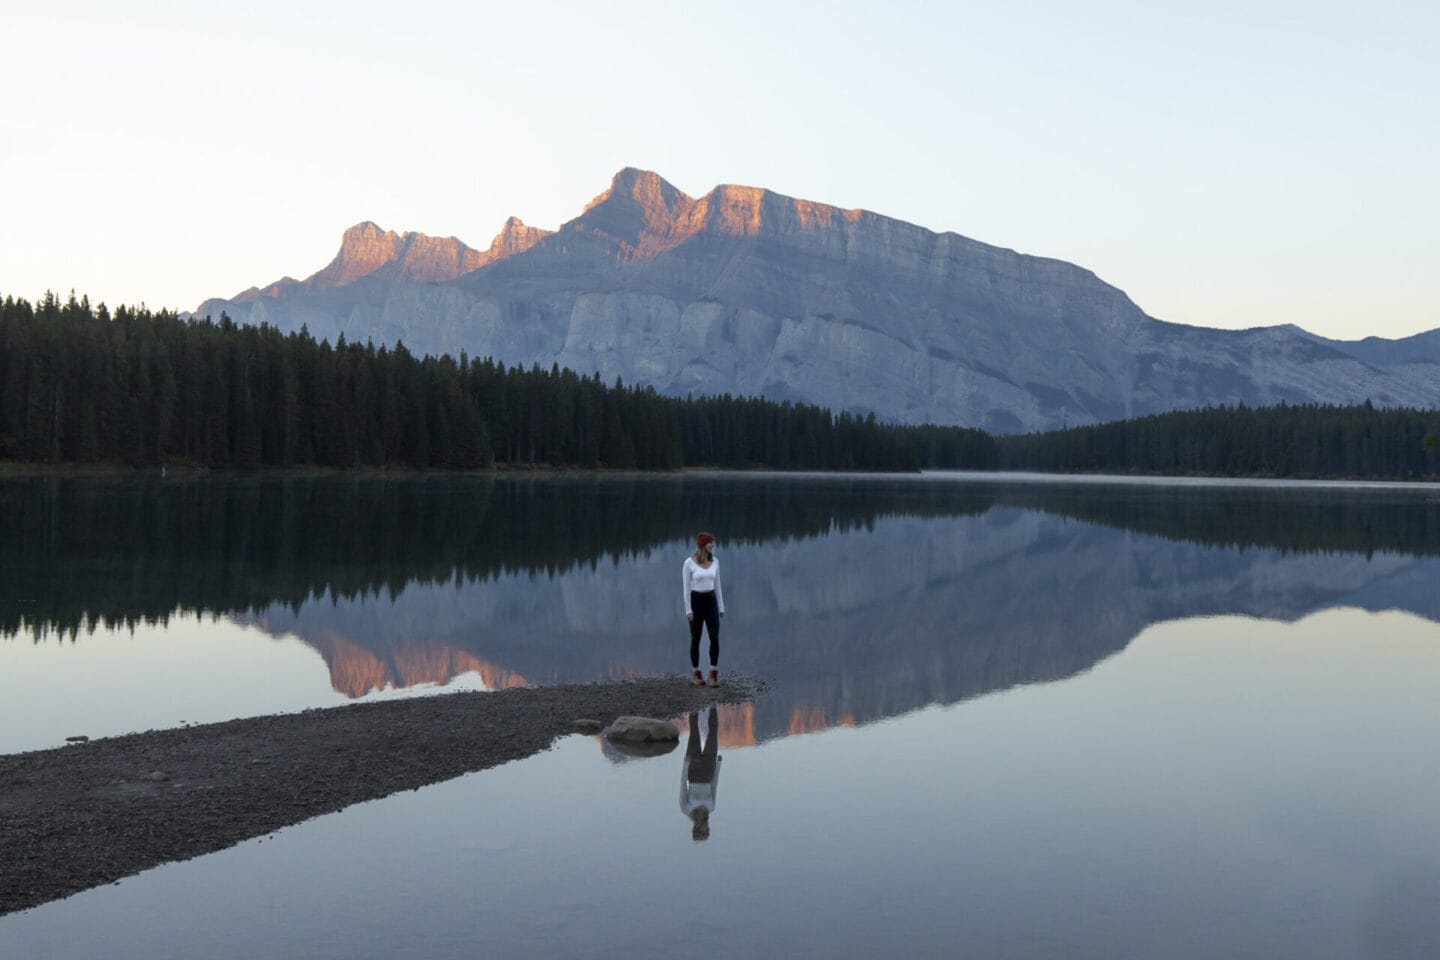
Two Jack Lake is another stunning lake in Banff National Park. Moraine and Lake Louise tend to steal the limelight but Two Jack Lake is actually one of my favoruite photo spots in Banff. It might not have the vibrant blue hues like other glacial-fed lakes but it’s still incredibly picturesque and has gorgeous views of Mount Rundle. The water is usually very still so you’ll often get picture perfect reflections of Mount Rundle in the water.
Best time for photography:
The best time to visit is for sunrise or sunset as the light hits Rundle perfectly. I’ve been for sunrise a few times and the conditions have been perfect and we even got a pretty alpen glow. The lake usually begins to freeze over in December and remains frozen until the end of May when it starts to thaw.
How to get there:
Two Jack is just a short drive from Banff town on the Lake Minnewanka Loop Road. Before you reach Lake Minnewanka, you’ll see a pull off for Two Jack Lake. If you don’t have a car and are travelling in summer, you can take the Roam Transit Route 6 bus to the lake.
5. Moraine Lake
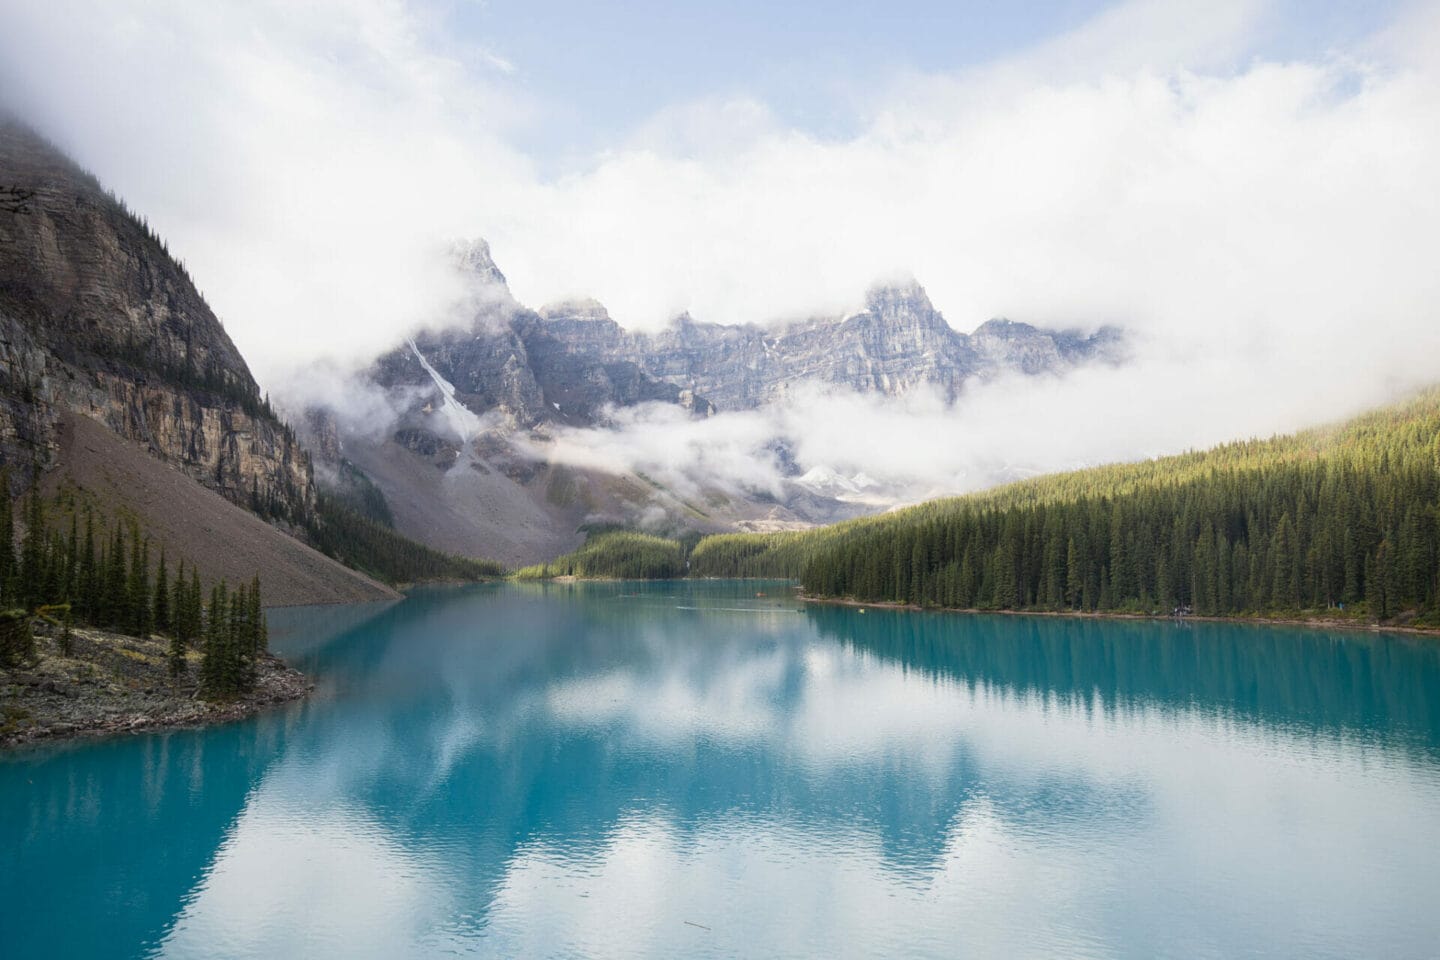
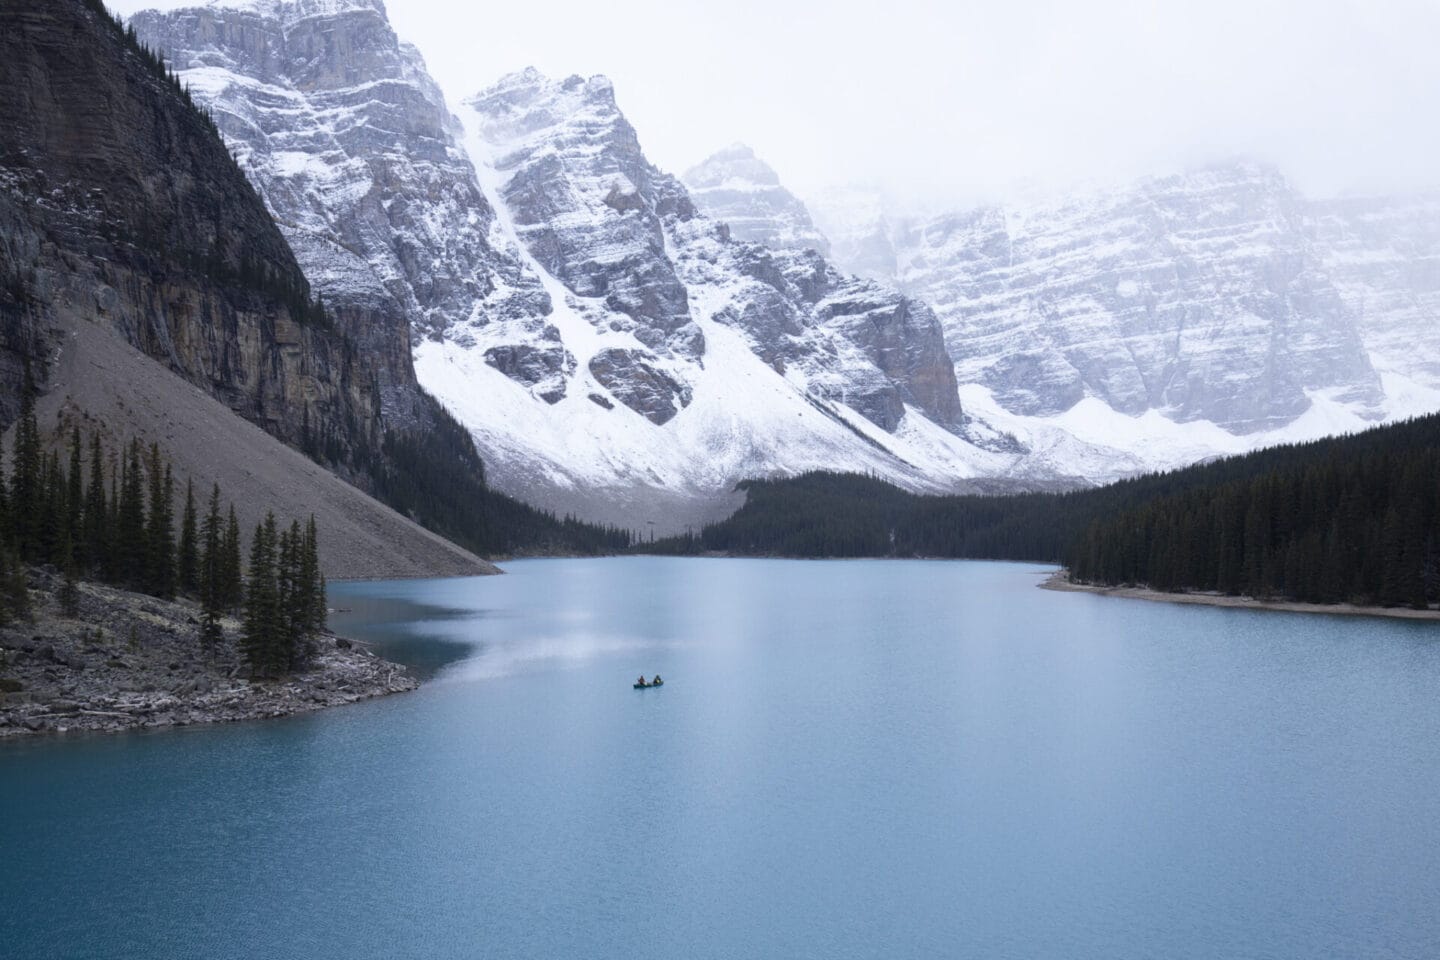
I couldn’t write about the best photo spots in Banff and not include Moraine Lake. Known for its vivid turquoise blue water, Moraine Lake is one of Canada’s most iconic sights. The lake is surrounded by the Valley of the Ten Peaks which makes for some beautiful photos. Its bright waters and snow-capped mountain peaks create a scene that’s almost too beautiful to be real. Walk along the shoreline or wander up the rock pile trail to get to the viewpoint where most of the famous shots of Moraine Lake are taken from.
Best time for photography:
The best time to visit is sunrise as the alpenglow hits the top of the ten peaks or in the day when the water is most vivid. I have been for sunset but wouldn’t recommend this as the sun dips behind the mountains too quickly. You don’t really get a sunset there although blue hour is quite pretty. Bear in mind that you can only photograph Moraine Lake in the summer as the road is closed from mid-October until early June due to avalanche risk.
How to get there:
In 2023, Parks Canada decided to close Moraine Lake Road to personal vehicles, so you are no longer able to drive to the lake. Instead, you’ll have to book a Parks Canada shuttles, use Roam Public Transit, or book a private sunrise shuttle. See my guide on how to get to Moraine Lake in 2026 here for all your options.
6. Larch Valley
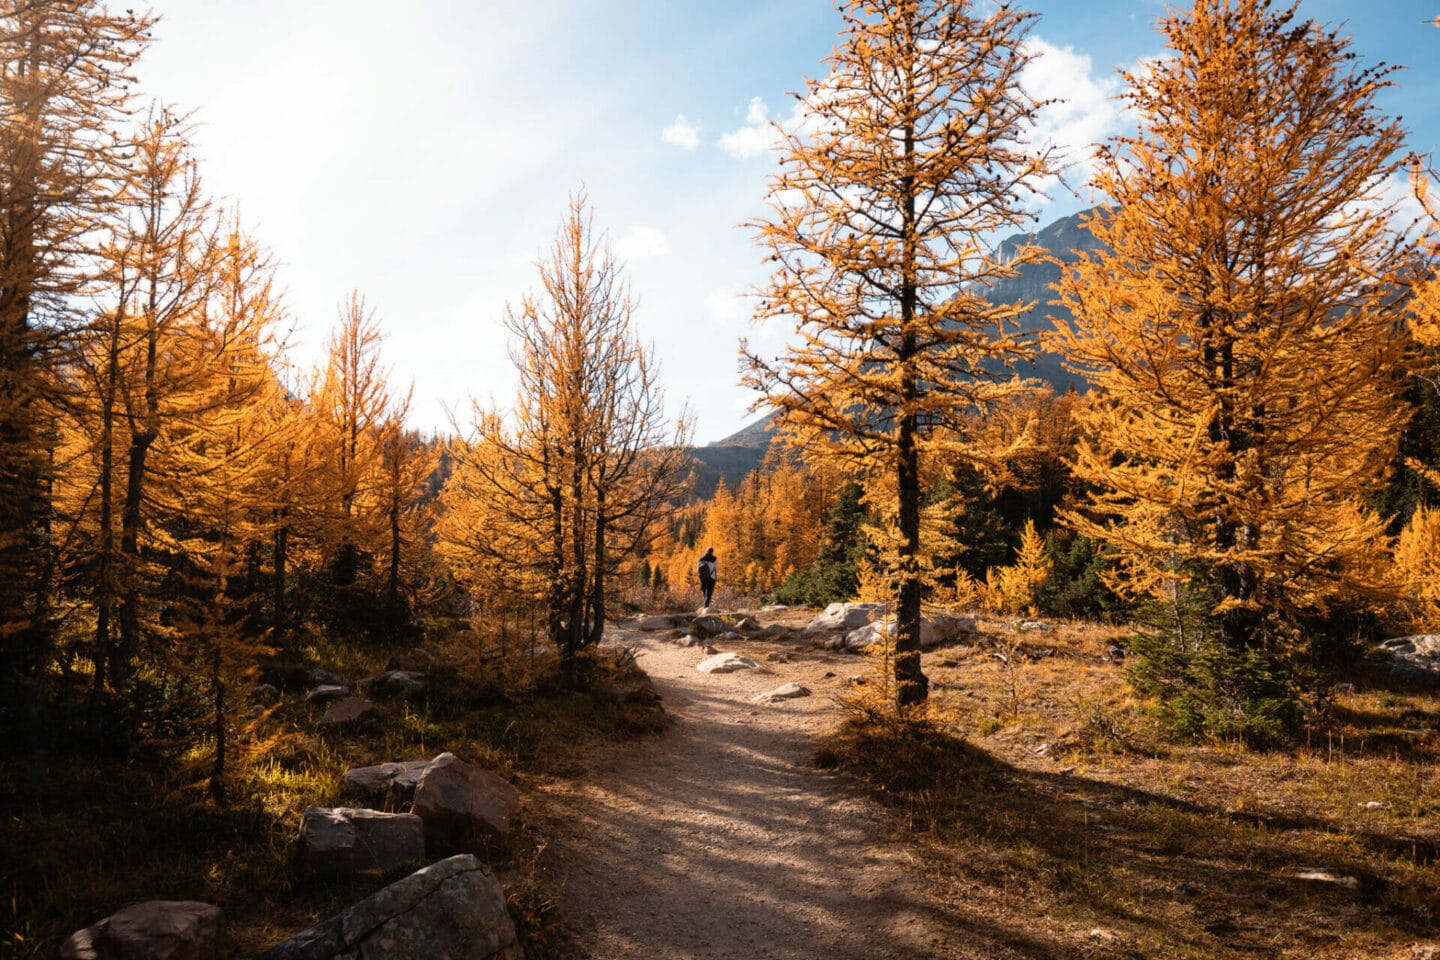
If you’re visiting Banff at the end of September or early October, add this photography spot to your list. The trail head starts from Moraine Lake and will take you up a number of switchbacks to Larch Valley and Minnestimma Lakes. It’s 4.3 km one way with a 535 m elevation gain but it’s worth it to see this seasonal wonder.
Best time for photography:
The best time to hike Larch Valley is usually during the last two weeks of September when the larch needles are a vibrant shade of golden yellow. However, it varies each year and when we went in 2022, they peaked during the first week of October.
How to get there:
The trail starts from Moraine Lake so you’ll have to book a Parks Canada shuttles or use Roam Public Transit. You have a few different options which I’ve listed in my guide to getting to Moraine Lake in 2026, but the key is to plan in advance!
7. Bow Falls
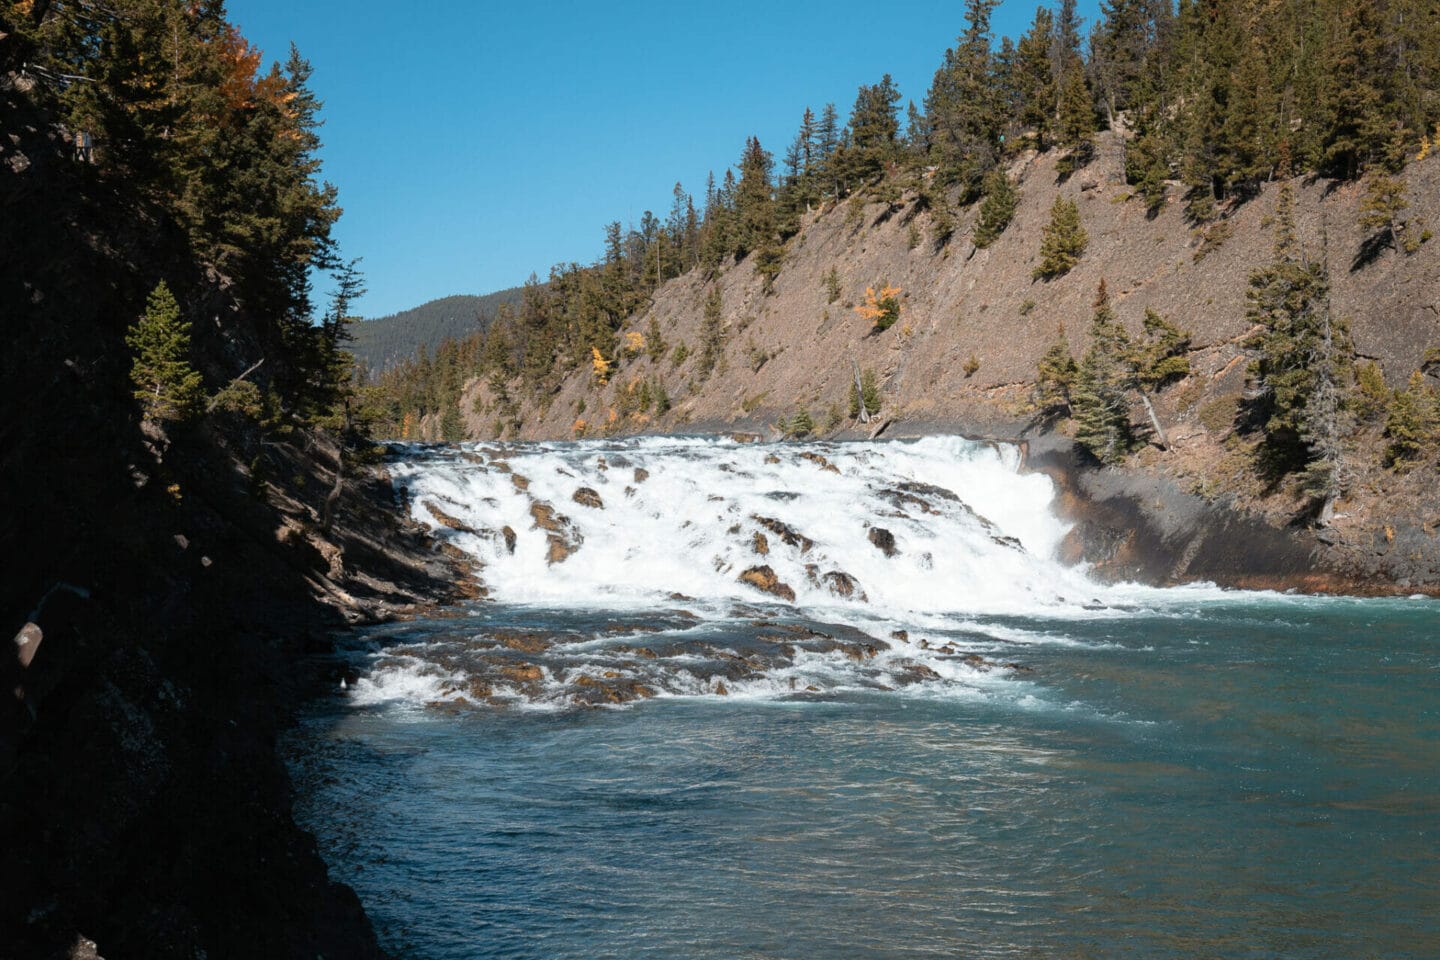
About 500 metres from the town, Bow River plunges into a rushing waterfall. Although the drop is only 9 metres at its highest point, Bow Falls is a dramatic sight, especially in early spring when the snow has just melted and the water levels are at their highest.
On the west side, you’ll get a wonderful view of the waterfall crashing over the rocks; while on the east side, you can look out over the rapids toward the iconic Fairmont Banff Springs hotel. This is known as Surprise Corner and is one of the prettiest photo spots in Banff.
Best time for photography:
Aim to go late afternoon once the tour groups have departed and it’s a bit quieter. The light will be softer and the shadows won’t be so harsh.
How to get there:
There is a parking lot next to the falls where you can park and walk along the trail to the roaring rapids. If you prefer to walk, the waterfall is only a short stroll from Banff Avenue. There are paved trails on either side of the river which lead to two beautiful viewpoints where you can admire the rushing white water of Bow Falls.
8. Surprise Corner

There aren’t any signs leading to this beautiful spot, but you’ll know you’ve reached it when the historic Fairmont Banff Springs Hotel suddenly comes into view. This spectacular and surprising viewpoint is where most of the famous photos of the ‘Castle of the Rockies’ have been taken. It’s an incredibly picturesque spot with Bow River in the foreground and Sulphur Mountain in the background.
Best time for photography:
The best time to go is sunrise or late morning when the light is at its best. Nighttime is another great time to photograph Surprise Corner as you can see the hotel lit up. It’s also a stunning sight in winter when the trees and surrounding mountains are covered in snow.
How to get there:
The surprise corner viewpoint is right off Tunnel Mountain Drive in Banff. There is a small parking area just past the view point where you can park and walk back to the observation deck. You can also walk from the town along Bow River. You will have to walk along the road for the last part so just be careful and watch out for cars.
9. Little Beehive

While a lot of Banff’s best photo spots are easily accessible, a few of the most iconic views require some hiking. Little Beehive is one of my favourite hikes in Banff National Park. It starts from the edge of Lake Louise just past the Fairmont Chateau Lake Louise. Along the way you’ll pass Mirror Lake and Lake Agnes (see below). When you reach the top you’ll get an amazing view looking down at the lake and the surrounding valleys.
The trail is well maintained but there are some rooty and rocky patches so watch your footing. It’s uphill all the way and although it is quite a steady elevation gain for the most part there are some steeper sections. Make sure you pack lots of water, snacks, and wear a comfortable pair of hiking shoes with good grip.
Best time for photography:
The best time to visit this viewpoint is first thing in the morning or later in the afternoon when the sun is not so high in the sky. It’s a popular sunrise spot but it does mean hiking up the trail in the dark. This area has a high concentration of Grizzly bears so I wouldn’t recommend doing this hike in the dark on your own. Aim to go with a large group, make lots of noise to alert bears to your presence so you don’t scare them, take bear spray, and read up on bear safety.
How to get there:
As I mentioned earlier, parking is very difficult at Lake Louise so I suggest take Roam Transit 8X if you’re coming from Banff without a car. It will take you directly to the Lakeshore. Alternatively, drive to Lake Louise Park & Ride and take the shuttle bus to the Lakeshore. You’ll need to plan ahead and book your shuttles in advance either way.
10. Lake Agnes
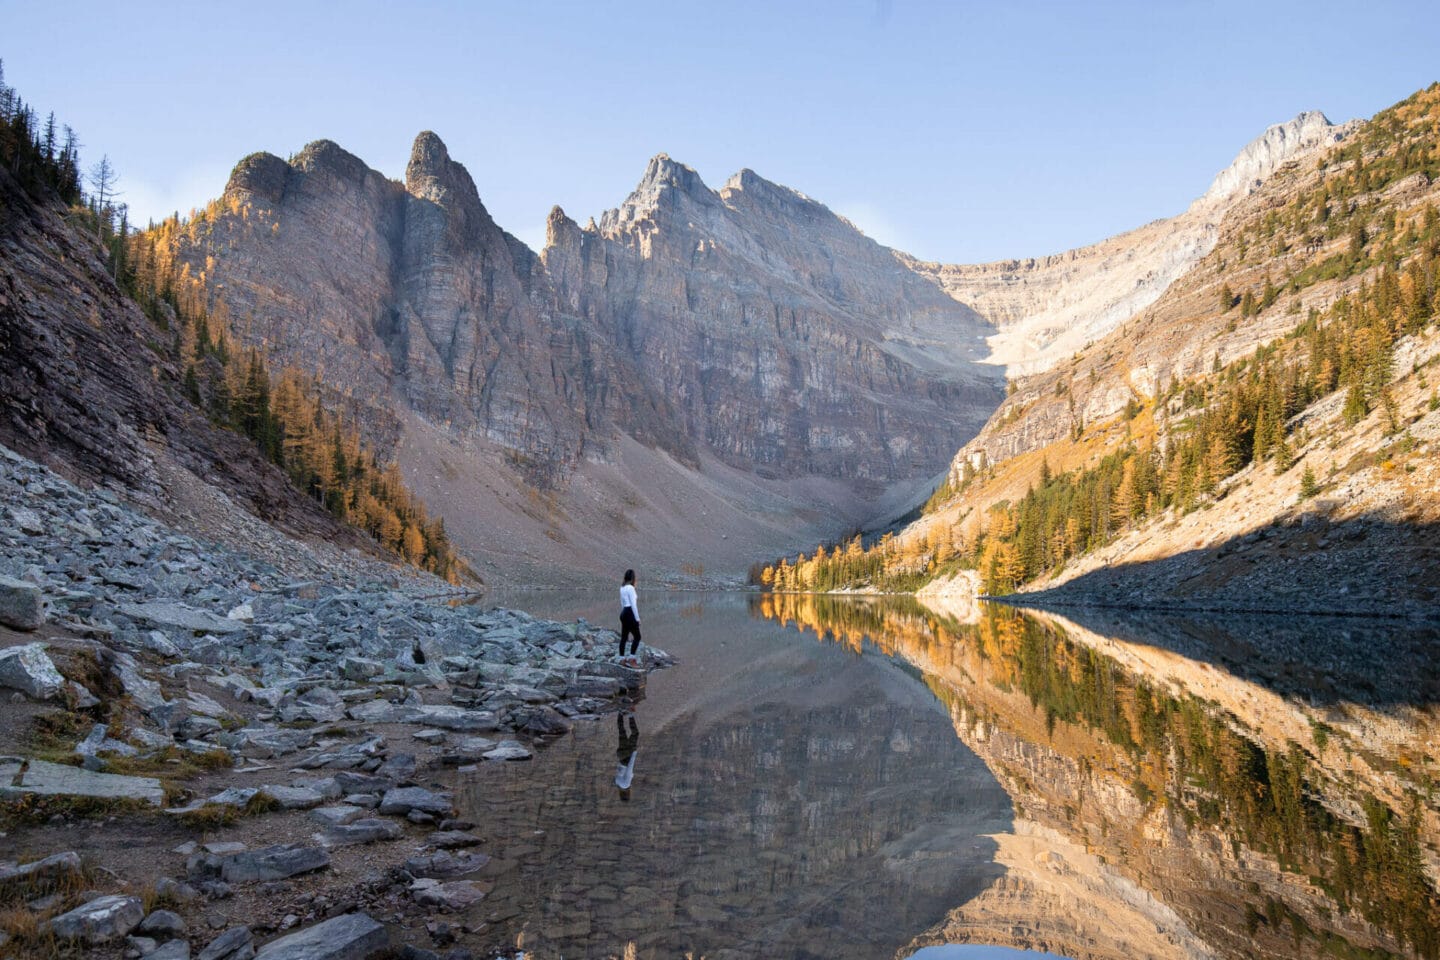
In my opinion, Lake Agnes is one of Banff’s most underrated lakes. It’s a beautiful photography spot near Lake Louise. To get there, you have to hike up into the mountain but it’s worth the trek. We stopped at the lake after climbing up to Little Beehive in October 2022 and were left speechless. The jagged mountain peaks and larch trees made me think we’d stumbled into the Italian Dolomites.
If you’re visiting Lake Louise, I highly recommend hiking up to see Lake Agnes. It’s an uphill climb but the views are gorgeous and there’s a cute tea house too! The best time to visit is when the larches are out so you get that extra pop of colour.
Best time for photography:
The best time to visit is when the larches are out so you get that extra pop of colour. To avoid the harsh shadows, try and go early in the morning or late afternoon. We ended up here around 12pm which couldn’t be avoided as we were doing Moraine Lake on the same day. It wasn’t terrible but I don’t love how strong the shadows are in some of my photos!
How to get there:
Head to Lake Louise and walk around the shoreline until you see the signs leading to Lake Agnes and Little Beehive.
11. Hoodoos

If you continue up Tunnel Mountain Drive, you’ll find one of Banff’s natural wonders – the Hoodoos. These natural towers are rock formations that have eroded over time. There are a few viewing platforms where you can see these sandstone spires towering above the treeline. The backdrop of the snow-capped mountains, thick forest, and gushing river makes for some stunning photos.
Best time for photography:
The best time to photograph them is first thing in the morning or later in the afternoon. Once the sun is higher up in the sky, it causes quite a glare.
How to get there:
The main Hoodoos viewpoint is located near the entrance to Tunnel Mountain Village Campground. There is a big car park opposite the entrance to the campsite where you can park. You can also get the Roam Transit shuttle bus (route 2) from downtown Banff.
12. Lake Minnewanka
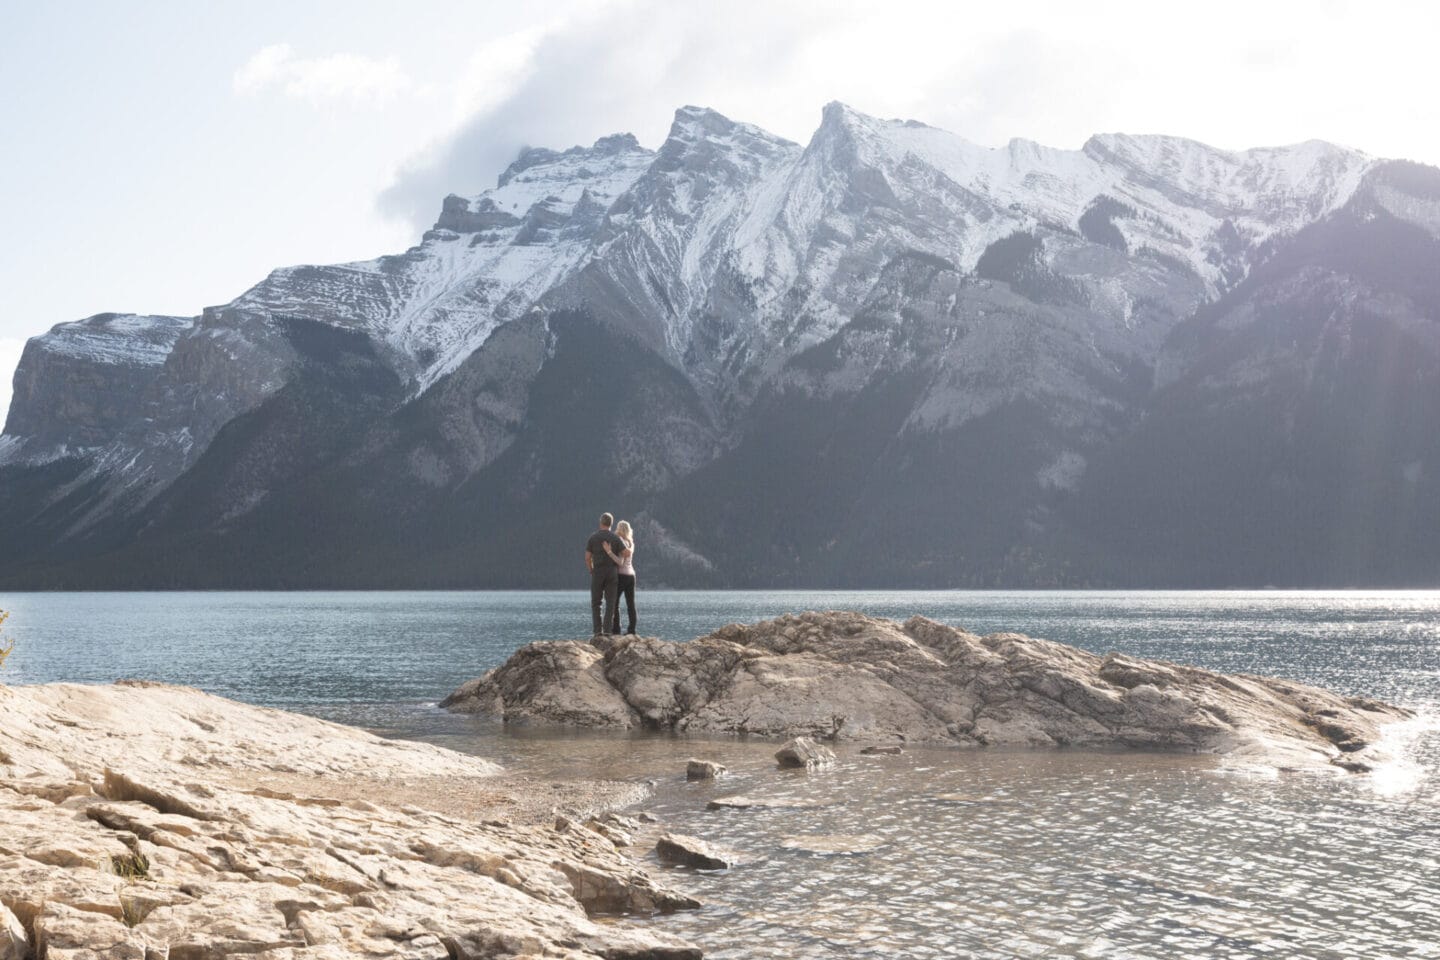
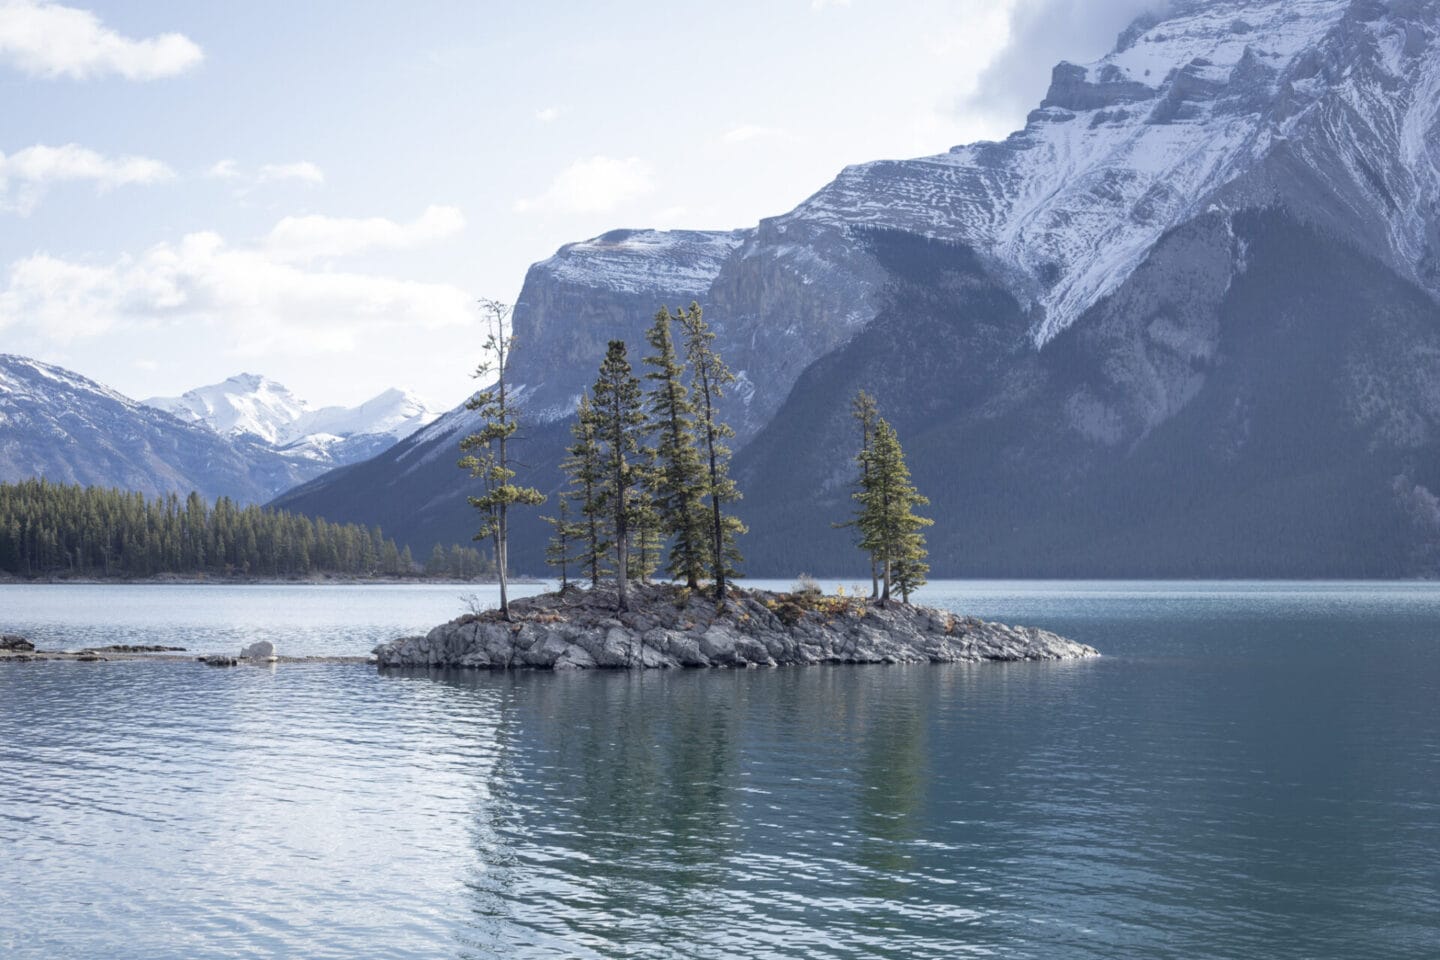
Named ‘Water of the Spirits’ by the Stoney Nakoda First Nations people, Lake Minnewanka is a large glacial lake fed by the Cascade River. At 21km long, there are plenty of photo opportunities at Lake Minnewanka. From the picturesque boat house to the little islands dotted with trees, it’s a picturesque setting. You can rent boats, kayaks and canoes or you can book a cruise around the lake for more photo opportunities.
Unlike quite a few spots on this list, there isn’t ‘one spot shot’ to get the best photo of Lake Minnewanka. It’s a large lake with lots of lovely viewpoints so you can get creative. If I’m shooting people as the subject, I personally love taking photos on the rocks with the mountains in the background.
Best time for photography:
I love all seasons as they bring something different. Winter is quite a fun time to photograph Lake Minnewanka as it is completely frozen and people often ice skate on it. Depending on the conditions, you can sometimes see the famous methane bubbles under the surface too! In terms of time of day, I’d go for sunrise or early morning (right after Two Jack Lake) or late afternoon when the light is softer.
How to get there:
Take the Lake Minnewanka Loop Road from Banff all the way to the lake. You’ll pass Two Jack Lake along he way so you can visit both photography spots on the same day. If you don’t have a car and are travelling in summer, you can take the Roam Transit Route 6 bus to the lake.
13. Sulphur Mountain (Banff Gondola)

If you’re looking for the prettiest photo spots in Banff, the summit of Sulphur Mountain may arguably be one of the best ones. You can hike 5.5 km (3.4 miles) to the top or, if you prefer, you can take the gondola and reach the summit in 8 minutes. Once at the top, you’ll be treated to incredible panoramic views of the mountain ranges, Bow Valley, and the quaint town of Banff.
There are observation decks as well as a boardwalk where you can get some stunning photos, especially at sunset when the sun settles behind the mountains.
Travel tip | You can buy your tickets for the Banff Gondola in advance for $74 CAD per adult. I book most of my tours through Get Your Guide as you can book in cancel up to 24 hours before your tour date and get a full refund. The weather changes so quickly in the Canadian Rockies so having this flexibility always gives me peace of mind.
Best time to go:
Aim to visit first thing in the morning or later in the afternoon to catch sunset. If you visit in the evening from December to March, you’ll get to experience Nightrise. This multimedia experience transforms the summit after dark through interactive lights, projections and sounds.
How to get there:
The Banff Gondola is located at the base of Sulphur Mountain at the end of Mountain Avenue in Banff. From Banff Avenue, travel south to the end and turn left after the bridge onto Spray Avenue. Stay right onto Mountain Avenue and follow that to the end where you’ll find the parking lot. You can also take Roam Transit Route 1 all year round.
14. Castle Mountain
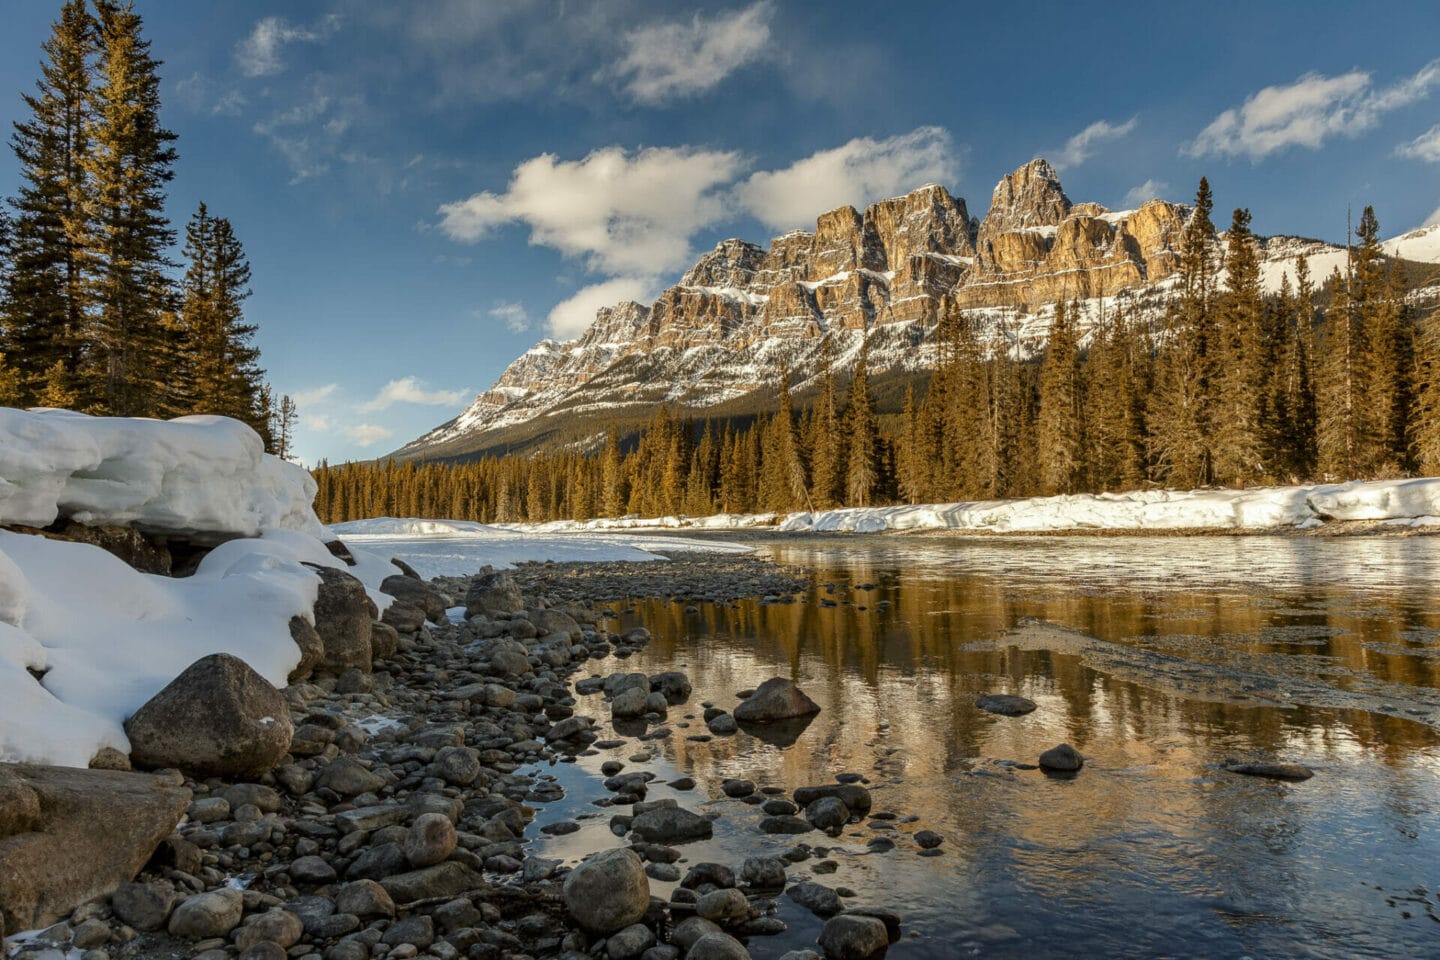
Named for its imposing appearance, it’s easy to see why early explorers thought the mountain resembled a medieval castle. There are lots of places to see Castle Mountain but a popular photography spot is down by the river.
Best time for photography:
It’s best seen first thing in the morning or at sunset and is even prettier in the winter when snow covers the river banks.
How to get there:
From Banff, it’s a short drive along Bow Valley Parkway. You’ll pass the parking lot for Johnston Canyon along the way so I’d recommend doing both stops on the same day. You turn left on to Banff Windermere Highway and will approach a bridge. Just before the bridge, there is a turnoff on your right where you can park. From here, it’s just a short walk down to the river. You have to pass through a wildlife gate so please make sure you close it after entering and exiting.
15. Vermillion Lakes
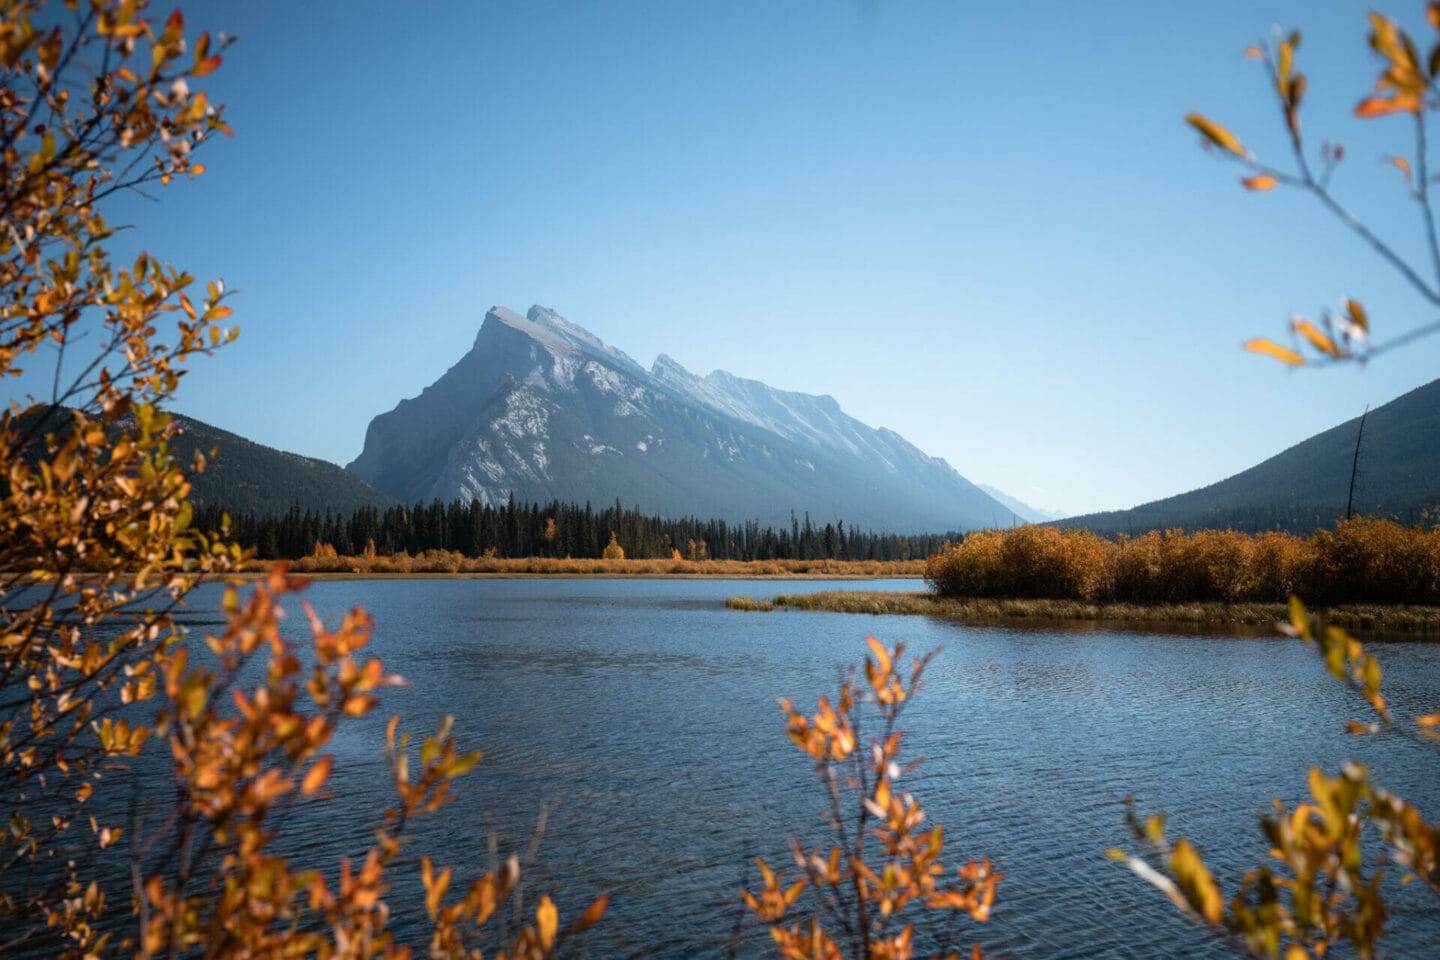
The Vermillion Lakes are a network of marshlands and vast lakes in the Bow Valley which offer incredible views of Mount Rundle and Sulphur Mountain. On a still day you can capture perfect reflections of the mountains in the lakes. In winter, the lakes freeze over and you can get some pretty winter wonderland shots. I’ve been here in all seasons and love this location for photography. I find it can be a lot quieter than other spots and you can get quite creative with composition.
Best time for photography:
It’s a lovely place to go for sunrise or sunset to watch the colours of the sky change whilst the sun’s rays illuminate the dramatic peaks.
How to get there:
Take the exit off the highway and onto Mt. Norquay Road and then onto Vermilion Lakes road. Drive slow as there are always lots of bikers on this road. The lakes are on your left-hand side and there are plenty of pull-off points.
16. Johnston Canyon

This dramatic canyon is one of my favourite photo spots in Banff National Park. The trail leads to the Lower Falls and then continues to the Upper Falls. It is 1.1 km (0.6 miles) to the Lower Falls and a further 2.5 km (1.5 miles) to the Upper Falls.
It’s a beautiful and accessible trail which leads you through the forest and over catwalks alongside the creeks, up into the canyon. There are lots of scenic viewpoints along the way so make sure you plan enough time to walk there and take everything in. In winter, the waterfalls freeze over creating a photogenic winter wonderland. The trail can be icy so make sure you have the appropriate gear. A lot of people were slipping all over the place so you need crampons or micro spikes.
Best time for photography:
As you can imagine, this is one of the busiest trails in Banff as it’s quite accessible. If you can’t get there first thing in the morning, then I would personally skip it as the crowds are insane by mid-day. The boardwalk is quite narrow in places so it’s just not a pleasant experience if you want to get nice photos. I also think it’s a much better winter photography spot. Seeing the waterfalls frozen is such a beautiful sight.
How to get there:
From Banff, drive north along the Bow Valley Parkway. The canyon is a 45-minute drive from Banff town centre and has ample parking. You can also take Roam Transit Route 9. In the summer, it runs 7 days a week. In winter, the service runs on weekends and statutory holidays (excluding Christmas Day). A single fare in 2026 costs $5 for adults and $2.50 for seniors and youth. Children under 12 travel free.
17. Bow Lake

Thirty minutes north of Lake Louise lies another of the best photo spots in Banff, Bow Lake. It is located just off the Icefields Parkway at the base of Bow Summit.
On a calm day, you can see the mountains perfectly reflected in the lake’s aquamarine water which creates some fun photo opportunities. The lake is one of the largest lakes in Banff National Park and is a lovely place for a picnic or short stop whilst driving the Icefields Parkway. There is a lovely bridge close to the Lodge at Bow Lake which is a popular photography spot.
Best time for photography:
This is another great sunrise spot in Banff National Park. I just love how the sun hits the peaks and slowly lights up the lake. Alternatively, sunset is a nice time to photograph Bow Lake.
How to get there:
Bow Lake is a 30 minute drive from Lake Louise. If you don’t have a car, you can join a tour which will take you to Bow Lake and Peyto Lake. I recommend the Lake Louise and Icefields Parkway tour. It’s a full-day sightseeing tour that will take you to Lake Louise, and then up the Icefields Parkway to Bow Lake and Peyto Lake, before dropping you back at your hotel.
18. Waterfowl Lakes
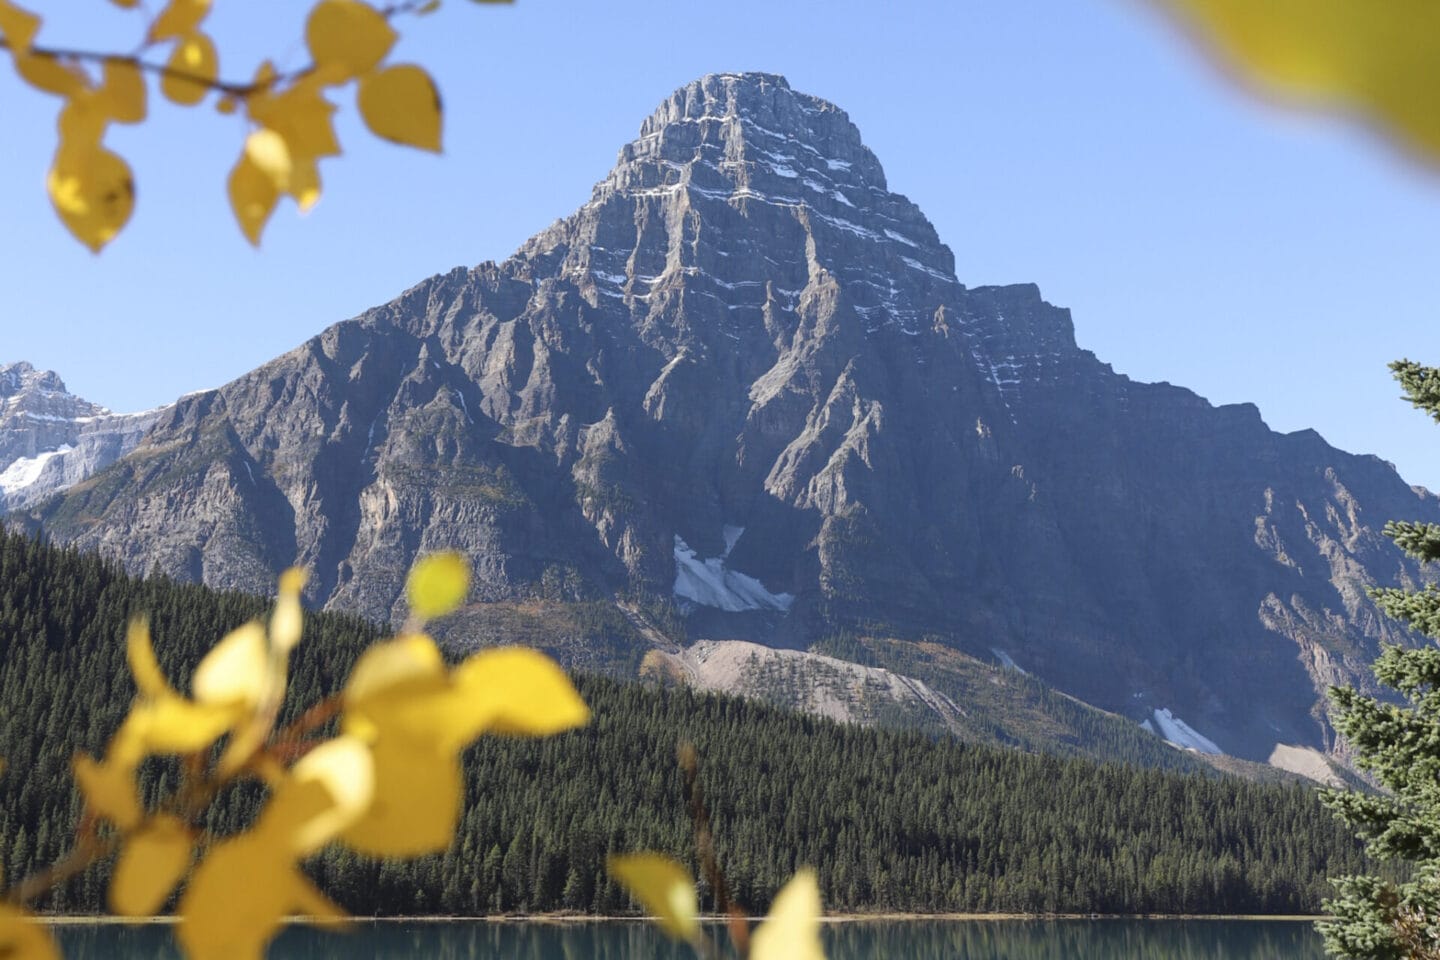
Located shortly after Peyto Lake, Waterfowl Lakes is one of my favourite photo spots in Banff National Park. The two lakes offer great photography opportunities, especially on a clear day when the mountains are perfectly reflected in the water. The last time I went, the larches had just turned golden and the contrast of the yellow tones against the turquoise water was magical.
Best time for photography:
Sunrise is best but the lakes are more vivid later in the day so if you need to prioritise other spots for sunrise, you can go here afterwards.
How to get there:
Drive along the Icefields Parkway past Peyto Lake and keep an eye out for Waterfowl Lakes campground. It’s very accessible as it’s located just on the side of the Parkway and there are a few pull off points.
Other must-see photo spots in Banff
There is no shortage of beautiful photo spots in Banff but here are a couple more locations near the park that you should check out if you have time:
19. Three Sisters in Canmore

Canmore is a beautiful mountain town just outside of Banff. It’s not as touristy as Banff and is where a lot of the locals live. There are lots of great photography spots in Canmore but one of my favourites is the Three Sisters. Faith, Hope and Charity are the names of the individual peaks that make up Canmore’s iconic mountain range. These impressive mountain peaks can be seen throughout Canmore but you can walk down to the river for a better view.
20. Emerald Lake in Yoho National Park
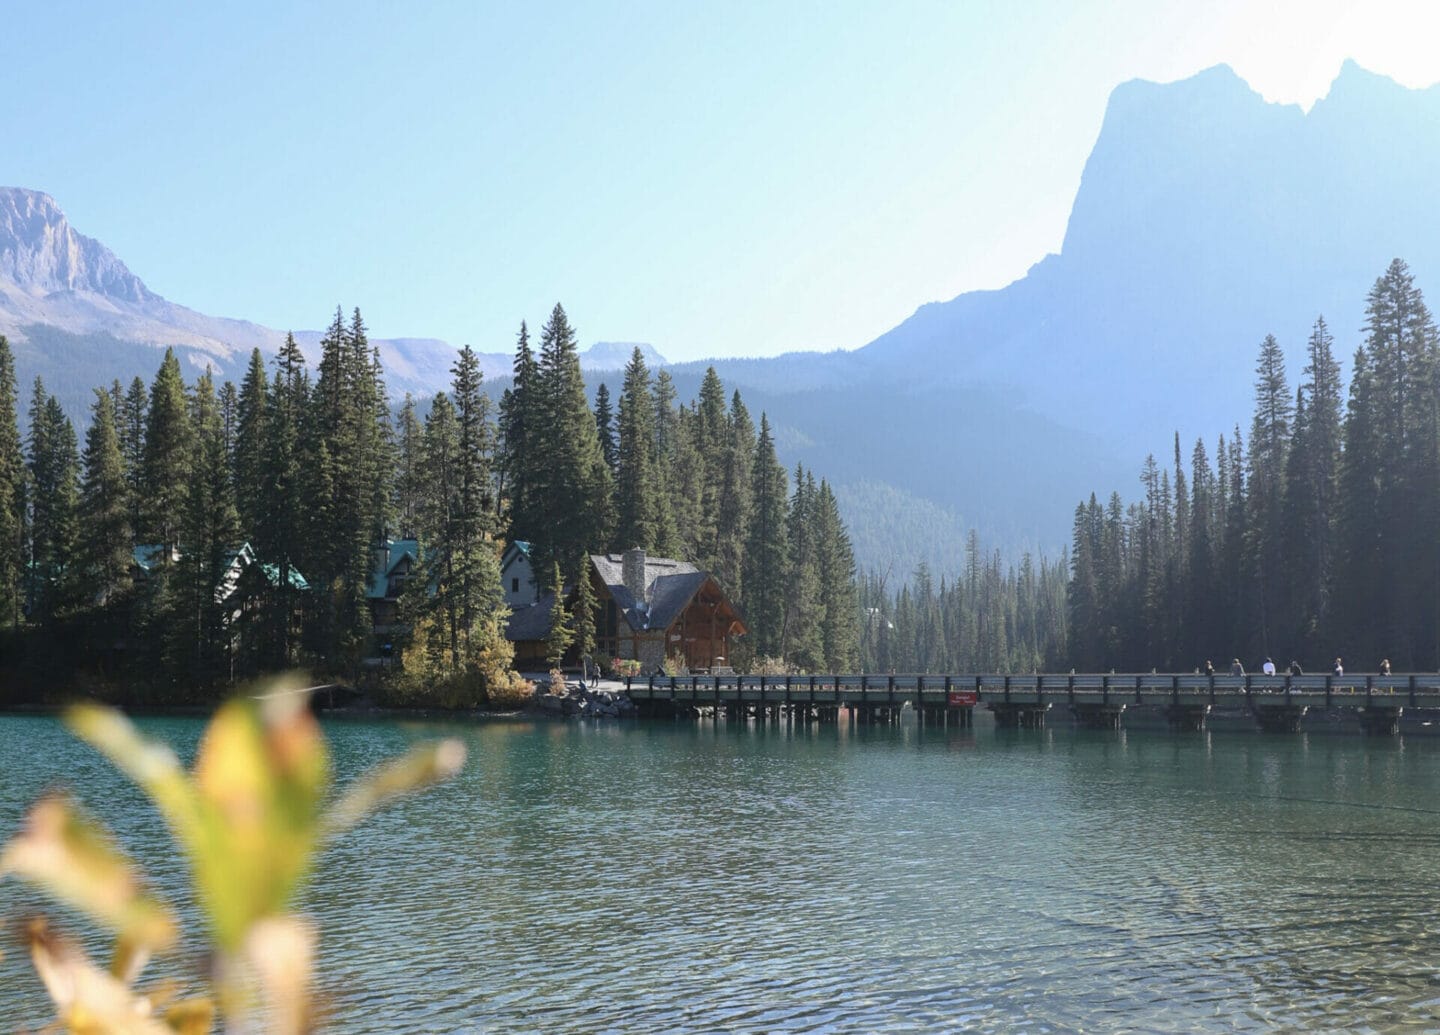
Located in Yoho National Park, Emerald Lake is only a 20 minute-drive from Lake Louise. Discovered back in 1882 during the construction of the Canadian Pacific Railway, the lake was named after its emerald-coloured water. Set against the stunning backdrop of Mount Burgess and Wapta Mountain, Emerald Lake is a very picturesque spot.
It’s a beautiful place to photography all year round. Aim to go first thing in the morning before the kayaks and canoes go out so you can take advantage of the calm water and reflections. Winter is also a magical time to visit the lake.
Best photo spots in Banff map
You’ll find all of the places listed in this article on my map below. To save this map, click on the star on the right hand side of the title. This will save the map to “Your Places” in the Google Maps so you can easily find the best photo spots in Banff.
Best photo spots in Banff: Photography tips
I’ve learnt a lot about photography over the years so here are a few tips to make sure you get the best photos possible when you visit the Canadian Rockies:
Photography in the Canadian Rockies is all about the light
The light in the hours leading up to and just after sunrise and sunset can help you create some beautiful images. I normally try and go out early in the morning and just before sunset to capture the hues of pink, red, and orange. Sunrise and sunset photography is even more stunning in the Canadian Rockies as the sun lights up the mountains creating a rosy ‘alpine glow’ which illuminates the mountain peaks.
Avoid shooting at mid-day if possible
I plan my route and itinerary very carefully to avoid filming and shooting in the bright mid-day light as it can be very harsh. As the sun is usually at its highest point from noon until 3pm, shooting during this period can be difficult as there are a lot of shadows which can hide the mountains’ unique features.
Be prepared for changing weather conditions
The weather can change very quickly in the mountains and as a result, so does the light. Check the weather conditions the night before but be prepared to have to change your plan. Make sure you have a waterproof bag and a camera rain cover to protect your gear from the rain. I have camera sleeves to protect my cameras when I’m using them on the tripod.
Take a variety of lenses
The landscapes in the Canadian Rockies are very varied so having a few lenses will help ensure you get the shots you want. Ideally you want to take lenses to cover a wide range of focal lengths:
- A wide angle lens to capture the scenes that are very expansive, such as Moraine Lake. I used my Canon 16 – 35mm f/4 for the majority of the trip as it allowed me to capture more of the landscape in front of me.
- A telephoto lens to help you get closer to the local wildlife. We saw so much wildlife on our trip and luckily I had a telephoto lens to get close up shots and footage without disturbing the animals. It’s also a great lens to capture distant landscapes and get those beautiful layer shots.
- A general zoom lens to cover everything else. I used a 24 – 70mm f/4 due to its focal length and sharpness. It’s great for everyday shots as well as getting close ups to show different textures such as the water and wildflowers.
Don’t forget your filters
I use polarising filters and graduated neutral density filters to reduce glare, smooth out water shots, and expose landscapes correctly.
When is the best time of year to visit these Banff photo spots?
I’ve been to Banff in every season now and can honestly say, it’s a magical place to visit and photograph all year round. Each season offers a unique experience and it’s incredible how different the same places look throughout the year. Most of the best photo spots in Banff are accessible all year; however, some of them do look more spectacular at certain times of the year. Here is a brief overview of what you can expect in each season:
Spring
The lakes are just beginning to thaw and many will still be partially frozen until at least May or June depending on the weather. It’s a lovely time to visit if you want to capture Banff between seasons. Most of the main attractions will be open but the road to Moraine Lake will likely be closed until June. There will still be quite a bit of snow on the ground at higher elevations.
Summer
If you want to see the turquoise lakes you should aim to go between July and September. However, be prepared for crowds as these lakes attract visitors from all over the world. Accommodation will also be more expensive and often gets booked up in advance.
Fall
At the end of September, the larches are starting to turn golden which is a beautiful sight. The lakes are still vibrant shades of blue and the crowds are starting to ease. This is personally my favourite time to visit as the temperatures are cooler than summer but still very pleasant for hiking.
Winter
Banff becomes a beautiful winter wonderland from November to May. However, the icy conditions and the risk of avalanches means that many roads and hiking trails are closed. The road to Moraine Lake closed end of October and doesn’t open again until June. This is my second favourite time to visit as I love seeing the frozen lakes and waterfalls. Travelling in winter requires extra planning. I have a whole blog post about planning a winter trip to Banff which covers everything you need to know, including driving conditions, what to pack, and seasonal closures.
If you’re trying to decide when to visit the park, have a look at my 4-day summer/ fall Banff itinerary and my best things to do in Banff in winter guide. These will give you a good idea of the things you can do and see in each season.
Final thoughts on the best photo spots in Banff
There are so many beautiful photo spots in Banff National Park and every time I go back, I discover more! I hope you found this blog post useful and it helps you plan your own trip to Banff. If you have any questions, please let me know in the comments below and I’ll do my best to answer them.
Where next?
I absolutely love Banff and have been lucky enough to visit several times over the past three years. If you’re looking for more inspiration for your trip, check out my guides:
- Things to know before your trip to Banff
- The ultimate 4-day Banff itinerary for first-time visitors
- The best things to do in Banff in winter
- Everything you need to know about visiting Banff in winter
- How to get to Banff without a car
Love from Steph
SAVE THIS POST FOR LATER

Plan for the Canadian Rockies with these guides
The best things to do in Banff in winter (2026/27)

Visiting Banff in winter 2026/27: Everything you need to know
The best stops on the Icefields Parkway (+ one-day itinerary)

How to explore Jasper without a car: Everything you need to know
How to explore Banff without a car in 2026